So since I am pretty good at building things (i am a self-employed woodworker) I decided to build my own version of a Spiderlight:

The total cost, for all the materials AND the bulbs is about 120$. That's about 350$ savings! Not bad.
So here's how I did it:

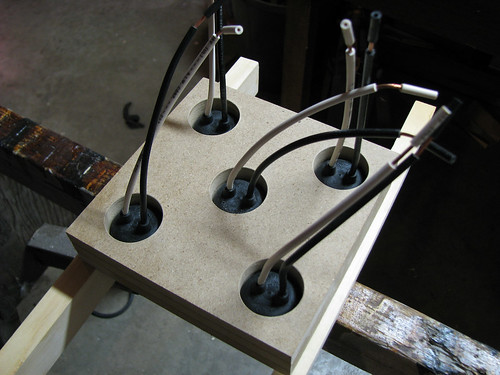
I started with some pieces of half inch MDF I had lying around. I glued 3 layers together to get about 1-1/2" of total thickness. The dimensions are 6-1/2" x 6-1/2". I then I took my 1-1/2" Forstner bit and drilled 5 holes. One in the center and 4 at the corners.
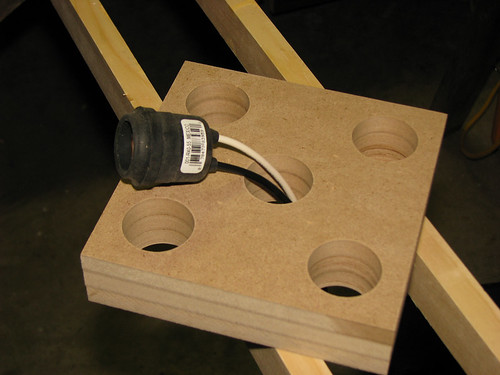
I bought 5 of these rubber bulb sockets. They're fairly inexpensive, running at $2.50 each.
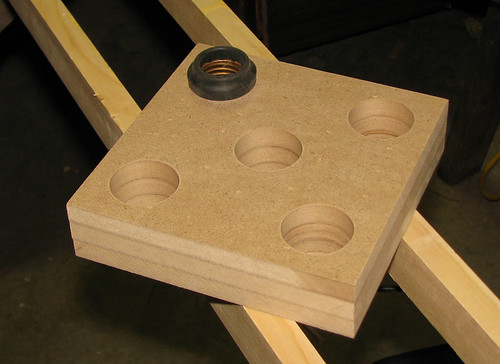
The 1-1/2" holes makes for a perfect, snug fit for these rubber sockets.
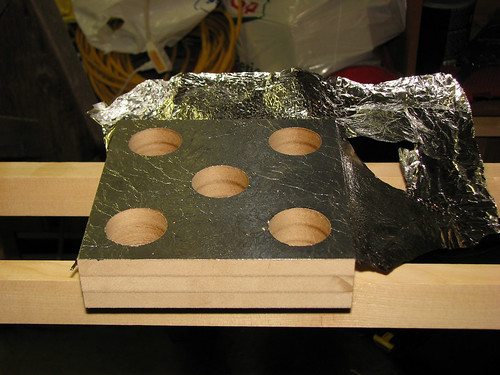
The next step is to add some aluminum foil to the bulb side. To get a more diffused effect I wrinkled the foil and then flattened it with an iron. I used spray adhesive to glue the foil to the MDF. I then removed any excess foil around the perimeter.
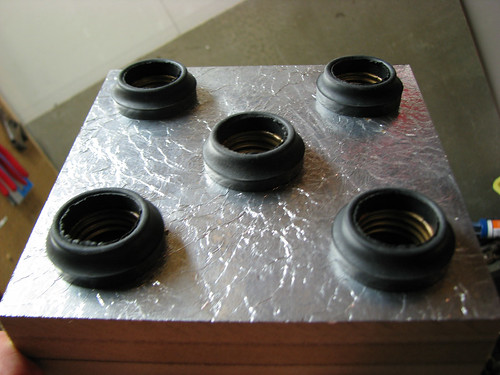
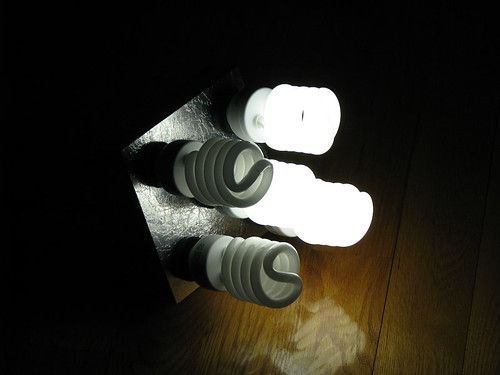
Here's what it looks like with all 5 sockets installed.
Viewed from the back.
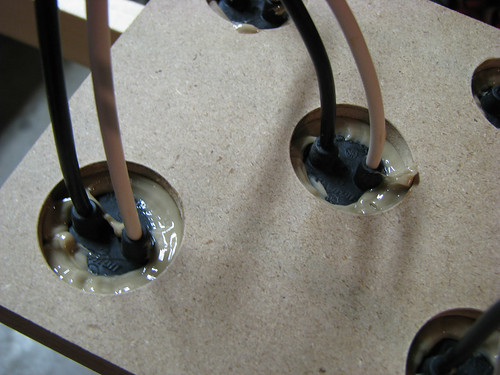
A generous amount of construction adhesive to hold everything in place.
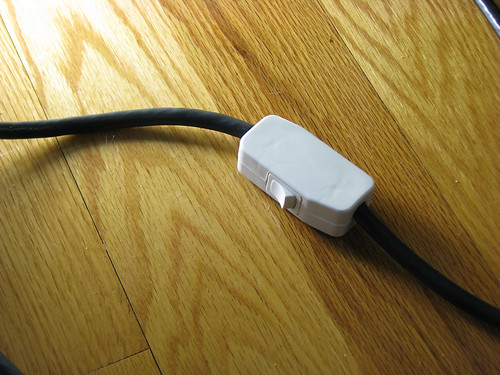
Now the fun part: electrical wiring! I bought this simple little wire switch to turn the whole thing on or off. Don't ask me what gauge the wire is, I just picked up the one that seemed the right choice. It has 3 wires inside. White, black, and green for grounding.

I bought a 4x4 metal box (normally used for laundry dryers) along with the cover plate. I also bought a 2 position "toggle switch" (seen here attached to the cover plate) that will allow me to turn off 2 of the 5 lights to get a little less illumination should the need presents itself. I drilled holes in the inside corners of the metal box to get the socket wires through. Then I screwed the box to the MDF. For liability issues I will not tell you how to wire this. Please note that I TAKE NO RESPONSIBILITIES IF PROBLEMS/FIRES/INJURIES RESULT FROM THE USE OF THIS TUTORIAL.

Here you can see the cover plate attached and the toggle switch in place.
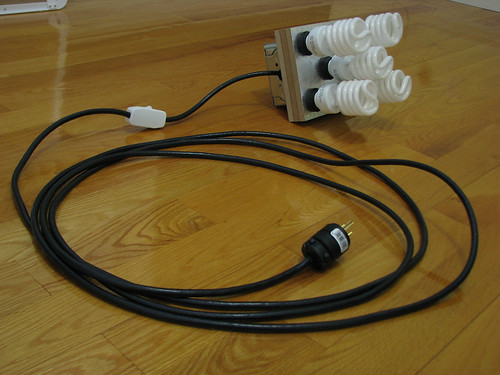
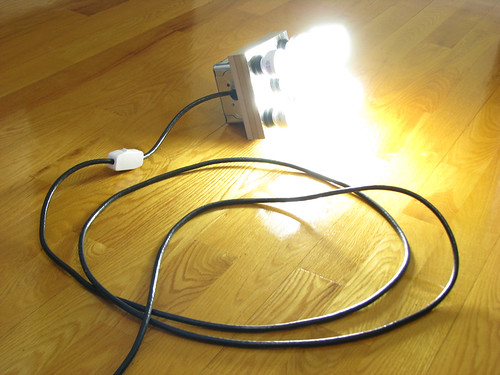
The finished product! Seen here with the wire, switch and wall plug.
The fluorescent bulbs are Phillips Marathon, 27Watt. The color temperature is 5000K, which is the closest to the full-spectrum sunlight I could find at the hardware store (I bought these in a Home Depot in canada). They came in pack of two for around 13$.
***** UPDATE May 1st 2008 *****
If you think that those 5 27W bulbs might not be powerful enough for you, you can replace the 27w's with 4 85W, 5000K General Brand bulbs (available at B&H). That would throw some SERIOUS light!
Taken with the exact same camera settings (except F3.2 instead of 2.7.. .go figure) as the previous shot. All 5 bulbs turned on. Yep, its bright.

Taken at 1/1600 sec. at F3.5.
Same settings, with two of the bulbs turned off using the toggle switch on the back.

Final Product.
Well I can say I am pretty happy with the results. The whole thing weights about two and a half pounds, making it light enought to put on any lightstand.
Come back later this week, as I will post another how-to article on building my 3'x4' softbox to go with the fixture. That one shouldn't cost more than 25$ if everything goes as planned.
The other thing i'll need to do is add some soft of attachment to fit on a lightstand swivel bracket. I might buy the one from Westcott. I will also buy my first lightstand later on.
Hope you liked the tutorial!
Next chapter: Building the Softbox !
2 comments:
آموزش طراحی سایت بدون کدنویسی با سیستم مدیریت محتوای وردپرس
https://webkima.com/wordpress-tutorials/
آموزش طراحی سایت بدون کدنویسی با سیستم مدیریت محتوای وردپرس
آموزش وردپرس
Good poost
Post a Comment