Well hello everyone.
Sorry it's been quite a while since my last posts about the spiderlight and softbox. I had waited a while for the parts needed to put everything on a light stand and I finally got them (like a month ago).
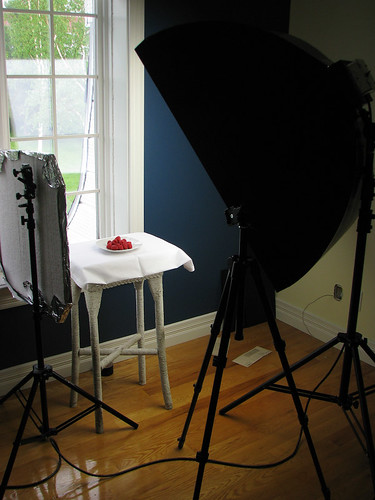
Now I finally found some time to take a few extra pictures as requested by a lot of people, and did a real good test out of everything. Read below for details.
First, I needed something sturdy to support this big softbox. So I went online to www.bhphotovideo.com and ordered an
Impact Air-Cushioned Heavy Duty Light Stand.Since this stand is only about 40$, I had a lot of doubts about it but when I got it I was amazed about how strong it really is. It's the perfect candidate to hold this big softbox.
Next I needed a swivel bracket to attach my spiderlight/softbox combo to the light stand and to be able to point it in the direction I want. Having looked over the official westcott website for a bit while designing my spiderlight fixture, I noticed
this nice tilter bracket they made for their real spiderlite.
It's not cheap (about 32$) but I wanted something of quality that could last beyond my softbox so for me it was an obvious choice. You can get it
here at B&H Photo.
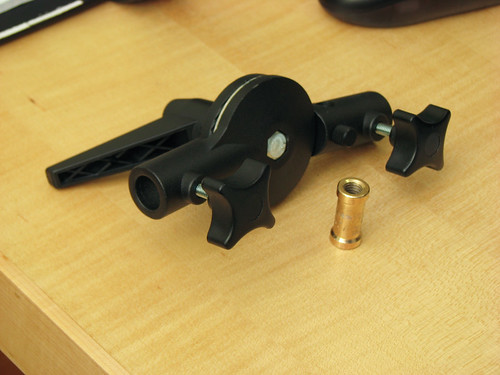
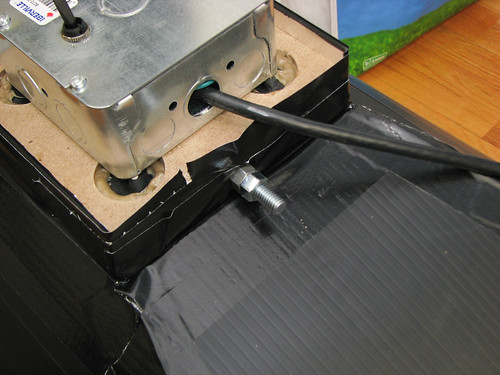
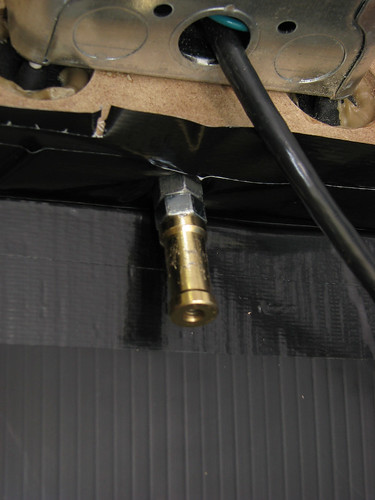
Since my softbox design attached directly on the spiderlight fixture (I will improve on that on my future designs), all I need to do is attach the spiderlight to the tilter bracket. Since the westcott tilter bracket already came with an insert pin, I went to my local hardware store and bought this double treaded bolt along with two nuts. One end is designed to screw into wood and the other one is like a bolt:

So I pre-drilled a hole in the bottom of my fixture and screwed the bolt in place. Since there is no "head" on this screw/bolt, the only way you can screw it is by using a combination of two nuts. See picture below of the bolt in place on my spiderlight fixture:
With tilter bracket insert pin in place:
All that needed to be done next is to fit everything together:

Overall view, with the heavy-duty light stand:

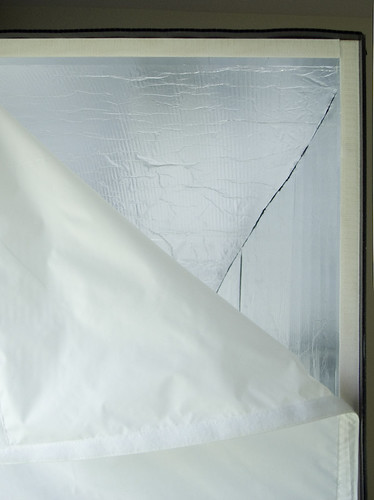
Some people also asked me how I proceeded with the diffuser panel. Since I like when things are nice and clean, I went to my local fabric store and had them cut my white cotton fabric to perfect size and sewed a velcro around the whole perimeter. Since I was there I also bought a piece of ripstop nylon and had the same treatment done to it. She sold me a couple meters of self-sticking velcro for my softbox, so now I have two different diffuser panels that will velcro on demand to my softbox. Sweet!
Next chapter:
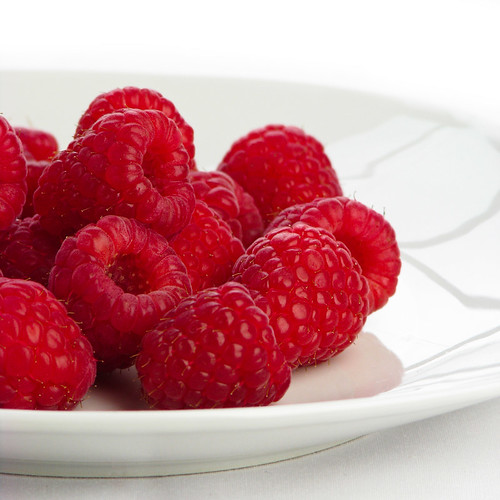
REAL FOOD SHOOT with the softbox!